Sunday, October 31, 2010

No Croutons Required - The Winner for October and the theme for November


Congratulations to Susan of Holly Grove Kitchen for winning the Noodle challenge for October. I can never resist mushrooms and I am excited to try this Mushroom and Noodle Soup.


I will be hosting the November edition of No Croutons Required. This month the challenge is to come up with a soup or salad featuring the mighty quinoa. Known to the ancient Incans as the "mother of all grains," quinoa is not really a cereal grass but is used just like a grain, with the important difference that is contains a food value that no grain can match. With an almost perfect balance of essential amino acids, quinoa is an unusually complete source of proteins in the plant kingdom, and is also a very good source of calcium, magnesium, phosphorus, iron, B vitamins and vitamin E. And as simple and almost as quick to cook as white rice, the light and fluffy texture and delicately sweet and nutty flavour of cooked quinoa makes it a tasty and healthy alternative in a variety of grain recipes.

Saturday, October 30, 2010

Sweet and spicy pumpkin seeds

It's difficult to enjoy Halloween with traditional treats when you have candida issues. I try to find low-carb, healthy alternatives to snack on like these sweet and spicy pumpkin seeds. They are toasted and sprinkled with salt, pumpkin pie spice and stevia powder. I also like to mix half pumpkin seeds with half sunflower seeds as shown in the illustration.

Sweet and Spicy Pumpkin Seeds
Ingredients:
  1. 2 cups pumpkins seeds or half and half
  2. sea salt to taste
  3. pumpkin pie spice
  4. pan spray
  5. SweetLeaf Clear liquid or powder

Directions:

  1. Toast the pumpkin seeds in a heated skilled sprayed with pan spray. Alternative method: spread the seeds on a baking sheet sprayed with pan spray and toast for 5 minutes at 350 degrees. I prefer the skillet method because I always over toast the seeds in the oven.
  2. When lightly toasted, spray and toss the seeds with additional pan spray. Then sprinkle on salt, pumpkin pie spice and stevia. Toss to coat and continue to toast being sure to monitor to avoid over cooking.


Friday, October 29, 2010

Salami Stromboli...

With today being a remodel work-free zone in the kitchen, I was able to get a new pizza together for our weekly Friday Pizza Night! Instead of the usual flat pizzas we've been making lately, we rolled individual portions to create the Salami Stromboli we had for our meal this evening!

With the pound of our homemade dough quartered, we stretched each piece out into a round and seasoned the flat, smooth tops by adding fresh grated Parmesan and a smattering of black pepper. For the salami, we went with a robust sopressata, sliced thinly, but there are many varieties out there... use what you enjoy eating! You could even go with pepperoni if you like, or even a milder cold cut like Capicola.

To fill out each Stromboli, on top of the sopressata we arranged thin slices of sharp provolone cheese and cubes of diced roasted red bell pepper. Mozzarella would be a good choice here too - either in addition to the provolone, or as a swap out. There is no special way to form these - just roll them up (not too tightly), then tuck the ends under and pinch any open seams to seal. Be sure they are put onto the pan with the seam side down.

It is good to slice a slit or three on top to let steam escape while baking, but don't go too deep. I went a little too far down (mainly because I forgot to do it and remembered a minute after I put them in the oven!) and we ended up having a fair amount of cheese escapage - nothing too major at least. I was thankful for that sheet of parchment we put down on the pan first though! The suggested cook time was 30 to 35 minutes, but that was far too long for our rolls - we pulled them around 22 minutes. We thought these were certainly fine enough to eat by themselves, but Jeff or I wouldn't have turned down a bowl of warmed (spicy!) marinara sauce for dipping!

Be forewarned, with the salami, it will seem and look fairly greasy at first take out of the oven. This is just the nature of the beast - try to just accept it and move on (surprisingly, it didn't come across as being that greasy on the tongue after it sat a few minutes!). If that scares you off (don't let it!), as I said earlier, you could use a different type of meat for the filling.

CKCA Fave Appetizer: Cold Sesame Noodles


On the heels of his big first place win at Kosherfest 2010's Cold Appetizer competition, Chef Avram Wiseman shares his favorite recipe for cold sesame noodles, sure to become a staple of your family's table for years to come. It is great appetizer or side dish, and it can easily be altered into a main dish when paired with grilled chicken, fish or tofu.

5 lb. soba, lo-mein, Or rice noodles
3 and 1/4 Cups strong hot tea
3 cups creamy peanut butter
3 cups soy sauce
1 cup sugar
2 medium cucumbers
1/2 cup toasted sesame oil
1/2 cup soybean oil
12 cloves peeled, chopped garlic
3 cups rice wine vinegar
12 scallions, washed, dried and minced
sesame seeds for garnish

Procedure:

Cook noodles as directed on package. Drain well. Rinse to remove extra gluten. Transfer to large stainless mixing bowl. Thin peanut butter with hot tea until smoothed. Add vinegar, soy sauce, sugar, oils and garlic. Pour mixture over noodles. Toss, cover and refrigerate.

Retoss noodles before serving. Peel, seed and jullienne cucumbers. Add minced scallions and cucumbers to noodles. Adjust seasonings, garnish with sesame seeds and serve.

Chef Avram Wiseman Takes First Place in Kosherfest's 3rd Annual Culinary Competition!


The Center for Kosher Culinary Arts is thrilled to extend congratulations to our own Dean of Students Chef Avram Wiseman on his first prize winning cold appetizer preparation in the Kosherfest 3rd Annual Culinary Competition, awarded on October 27th at Kosherfest 2010!

Chef Wiseman wowed the judges and the audience with a fresh fillet of wild caught Long Island Striped Bass rubbed with a tandoori spice mix, which was grilled and placed over a lentil salad. The fish was topped with a spicy pineapple salsa and was plated with a micro green salad with tarragon vinaigrette.

There were three other competitors in the event: Chef Pini Ben-Ari from U-Cafe, Chef Albert Bijou of Heaven's Kitchen Corporation and Chef Salim Fysal of Dashkin Glatt Kosher Indian Bistro.

Each chef had five minutes to assemble and plate four orders of their dish for presentation to the judges for tasting.

The event included judges Roberta Scher and Lois Held of Koshereye.com, writer/education Ted Merwin and cookbook author and James Beard Award Winner Gil Marks.

About Chef Wiseman


As any of his students will tell you, Chef Wiseman is an outstanding, caring chef instructor with many years of industry experience, though he has often said that his first love is teaching. Early in his career, Chef Wiseman held an astonishingly diverse number of positions in a wide array of settings — as banquet chef at the Tan a Tar Marriot, Missouri, Chef Garde Manger at the Garden City Hotel, Executive Sous Chef of the kitchen at the United Nations, and Executive Chef at the Riverhouse Restaurant.

Chef Wiseman is more than a little familiar with the demands of the kosher kitchen, having served as the executive chef for Lederman Caterers in Queens, Kay Caterers in NYC, President Caterers in Long Island, and is currently working as a consulting chef for Paradise Caterers at Marina Del Ray in The Bronx. He is also a Yeshiva graduate.

Chef Wiseman began teaching, his true passion, in 2000 at The Art Institute of New York. Over the six years he spent there, he earned a CHE certification in hospitality education and completed coursework in teaching methodology.

The next professional training class that Chef Wiseman will be teaching will be the Culinary Arts Certificate program in kosher culinary arts, beginning January 3, 2011 and ending March 15, 2011. The next recreational program taught by Chef Wiseman will be "Ask the Chef," a culinary demonstration and tasting, on November 27, 2010. Call 718-758-1339 for more information.

About the Center for Kosher Culinary Arts


Based in Flatbush, Brooklyn, above a cookware store owned by Lubavitcher Jews, CKCA initially offered only recreational cooking, cake decorating and garnishing classes. However, many people who attended the classes requested professional training, so they could learn classic techniques and apply them in professional kosher environments. Until CKCA was established, the only way a kosher-keeping student could study the culinary arts in the United States was to attend a non-kosher program and rely on classmates to taste the food. CKCA is also one of the only ways a non-Jewish student learns the art of kosher cooking, in order to compete for an increasing number of jobs in kosher restaurants and catering. Several experienced master chefs are on CKCA's permanent faculty as chef instructors, including Chef Avram Wiseman, formerly Executive Sous Chef at the United Nations and Chef Instructor at the Art Institute of New York.

Over the past two years, approximately 140 individuals from numerous states and abroad have completed CKCA professional courses. Those who have desired internships have been placed, and many have found work through CKCA as well. Several grads have opened their own food-related businesses, and many have found commercial success working as personal chefs and caterers. For more information, visit http://www.kosherculinaryarts.com.

Thursday, October 28, 2010

Quinoa Pudding


Warm and fragrant steam rising from a gently simmering saucepan of quinoa pudding is really almost as enticing an experience on a cool autumn day as savouring its delicate texture and slightly sweet and nutty flavour in the bowl. Resembling small opaque tapioca pearls swimming in cream, quinoa pudding is just as pretty and easy to prepare as tapioca. And with quinoa's almost perfect amino acid profile as well as bountiful calcium, magnesium, phosphorus, iron, B vitamins and vitamin E, it's also versatile and wholesome enough to serve as a delicious and nourishing breakfast porridge.
Quinoa Pudding

1 cup dried quinoa
1 3/4 cup whole fat milk
3/4 cup heavy cream
1 tablespoon brown sugar
1/2 teaspoon vanilla
pinch of sea salt


Rinse and scrub the quinoa under cold running water. Place in a bowl, cover with fresh cold water, and leave to soak overnight. Drain and set aside.

Combine the milk, cream, brown sugar, vanilla and sea salt in a medium saucepan and bring to a low boil over medium heat. Reduce the heat to low and stir in the quinoa. Simmer gently for 20-25 minutes, stirring occasionally to prevent skimming, until the quinoa is soft and the pudding thickened.

Remove from heat, ladle into bowls, and scatter with fresh berries, chopped pistachios, or the toppings of your choice. Serve warm.

Other recipes you may enjoy:
Breakfast Quinoa Porridge
Arborio Rice Pudding
Rum Plum Clafouti

On the top of the reading stack: Some Points in Between... Up Till Now Images of Robert Polidori

Audio Accompaniment: wind and rustling leaves

Pumpkin Bread Pudding

I made this on the spur of the moment the other day after gazing upon a day old half of baguette that was sitting on my counter totally intended for breadcrumbs. The winds were 60mph here in the Chicago area so this was the perfect dessert for a cool crisp day!

I've been stocking up on canned pumpkin because I'm always hearing there's a shortage of it so I had plenty of that along with all the other ingredients.

This was so quick to put together, the longest part was waiting for my raisins to soak up the bourbon, but oh it was so worth the wait!
Of course the bourbon is optional if you want to omit it just double the amount of hot water.
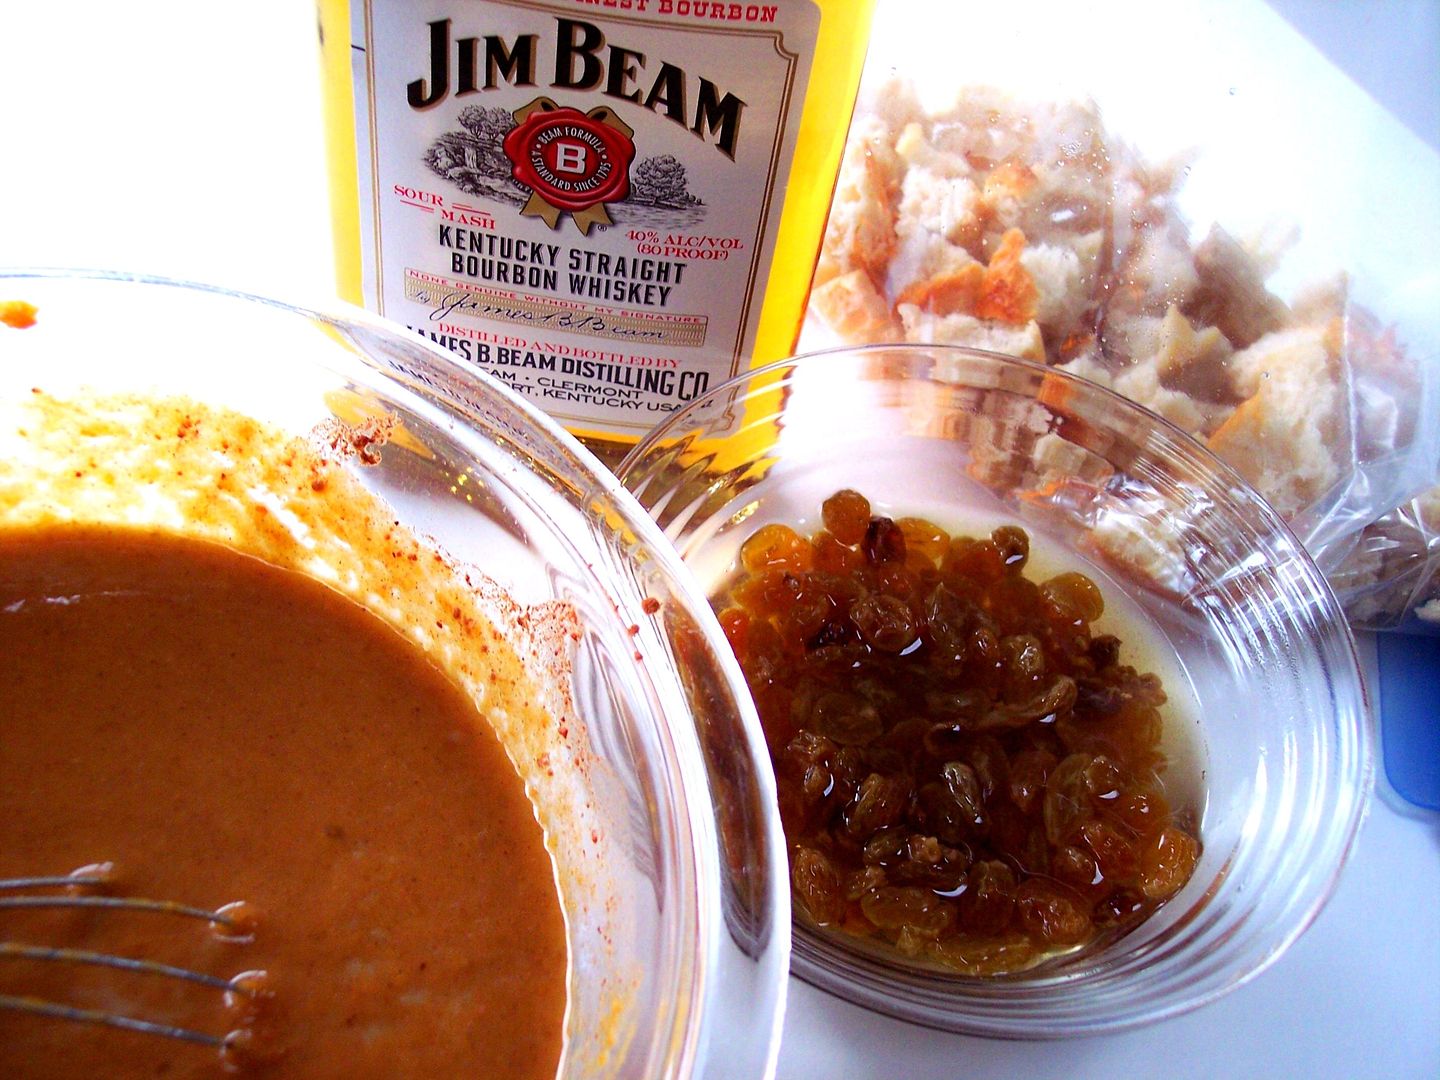
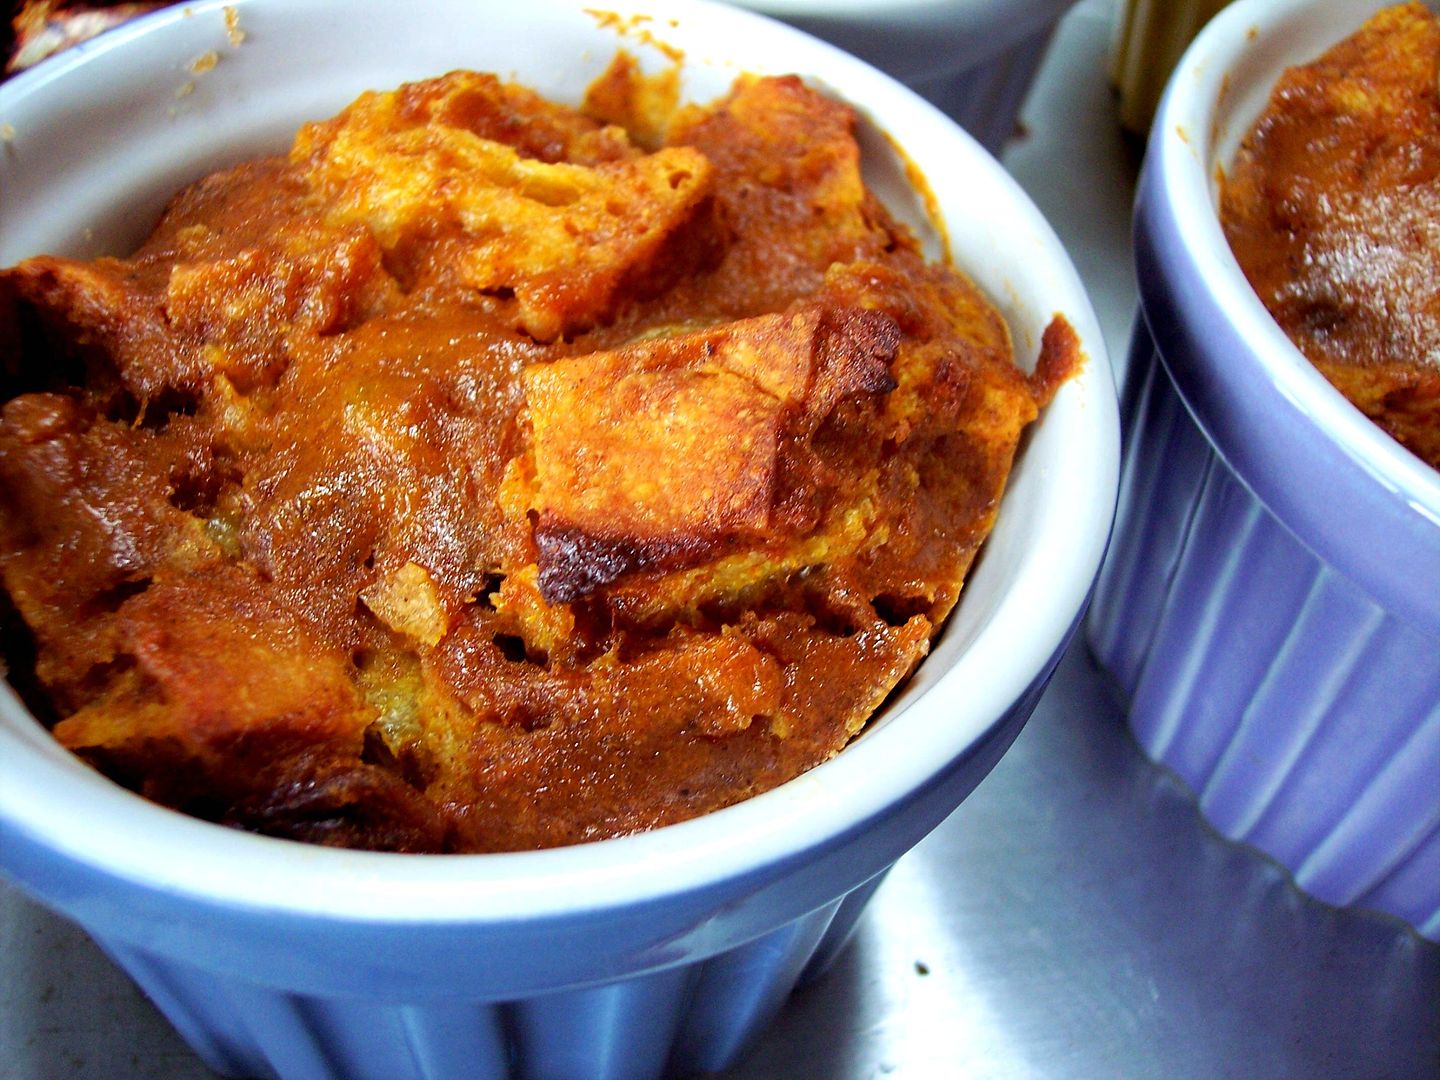
Add all your ingredients into one bowl, whisk it up and pour the mixture into individual ramekins, perfectly portioned for one.

The aroma is amazing, the warm spiced custard along with the bourbon soaked raisins will put a happy smile on your face! Feel free to put a dollop of vanilla ice cream on top if you wish.

Pumpkin Bread Pudding
Adapted from Martha


Unsalted butter, room temperature, for ramekins
6 tablespoons brown sugar
1 cup golden raisins
1/3 cup bourbon
1/3 cup hot water
One 15-ounce can pumpkin puree
4 large eggs
1 cup sugar
1 1/2 cups milk
2 teaspoons vanilla
1 teaspoon ground cinnamon
1/2 teaspoon ground ginger
1/2 teaspoon ground allspice
1/4 teaspoon nutmeg
1/2 teaspoon pumpkin pie spice
Pinch of salt
One 12-ounce day-old loaf brioche, challah or rustic baguette cut into 3/4-inch cubes
Confectioners' sugar, for dusting


Directions
1. Preheat oven to 350 degrees. Butter six 10-ounce ramekins or custard cups, and sprinkle each with 1 tablespoon brown sugar, set aside on a baking sheet. Place raisins in a small bowl, and cover with bourbon, if using, and the hot water; let soak until plump, about 20 minutes. Drain; set aside.


2. In a large bowl, whisk together pumpkin, eggs, sugar, milk, vanilla, spices, and salt. Toss in the bread cubes, and stir gently to evenly coat; let stand a few minutes. Fold in the raisins. Divide among ramekins, pressing down slightly to make level.


3. Bake until custard is set in the center and top is golden, about 40 minutes. If bread browns too quickly, cover loosely with aluminum foil. Remove from oven; let cool slightly. To serve, un-mold onto plates; dust with powdered sugar.
Enjoy and Buon Appetito!

Tuesday, October 26, 2010

Halloween madness...

With Halloween right around the corner, I asked Jeff what he would like to bring in for the Weekly Wednesday Treat Day. I had an inkling of what he was going to suggest, but I thought he might spring for a new goodie this year - nope, he didn't even hesitate when "Butterfinger Eyeballs" blurted out of his mouth.

They are a bit labor intensive, but they always go over well and since we haven't made them for his new co-workers before, I followed through on his wishes. I didn't have much luck finding regular red gel coloring this time, so we went with what we found.... sparkle gel! What, don't bloodshot eyeballs deserve a little fancy treatment too? If you still haven't tried them, what are you waiting for? Grab a jar of peanut butter, a bag of confectioners' sugar and start chopping up bars of crunchy Butterfinger bars (saving yourself a couple, of course!) and get these made - you still have plenty of time!

Since there isn't much to talk about, we thought it would be nice to post some past Halloween favorites! Maybe we can inspire you to get yourself in the kitchen and create a new tradition!

Remember this?

Our pumpkin pizza of 2008! Definitely fun for the little ones to not only help assemble, but eat!

A few years ago, we took our favorite outrageous brownie recipe and made with festive by using those orange Oreo's!

It may not scream Halloween, but you could always stamp them out in ghoulish shapes with a cookie cutter!

Last year we brought in those brain cupcakes for treat day.

Who knew brains would could be so tasty?

Don't forget about the other pizza we made!

Candy Corn Pizza! Never fear, there are no sweet candies in this pie - just a mess of cheese and pizza sauce!

Happy Halloween!

Monday, October 25, 2010

Black and Yellow Chickpeas with a Coconut Chili Sauce

My trusted volume of 660 Curries by Raghavan Iyer has many post-it notes sticking out from the pages. Excuse me for once again raving about this fabulous book that includes lots of inspired ideas for spice blends, appetizers, paneer dishes, legumes, vegetables, grains and fusion style Indian curries. The introductions to his recipes are informative and highly entertaining. This cookbook is highly recommended from Lisa's Kitchen and it makes a great gift too for cooks that enjoy creative and heart-warming, but often easy to prepare, Indian dishes. Coconut and chilies go so well with the chickpeas and spices in this dish. While the black chickpeas add a nice texture, wholesome regular yellow chickpeas could be substituted instead.
Black and Yellow Chickpeas with a Coconut Chili Sauce

2/3 cup of dried black chickpeas
1/3 cup of dried yellow chickpeas
6 green cardamon pods
2 bay leaves
2 cinnamon sticks (roughly 2 - 3 inches long)
4 tablespoons of ghee or a mixture of butter and oil
2/3 cup of dried coconut
1 tablespoon of coriander seeds
4 - 6 green chilies, chopped
1 teaspoon of black mustard seeds
a generous handful of dried curry leaves
1 1/2 teaspoons of sea salt


Rinse and soak the chickpeas in enough water to cover overnight. Drain, transfer to a large pot and add 3 cups of water. Bring to a boil, add the cardamon pods, bay leaves, cinnamon sticks, cover and reduce the heat to medium low and cook until the chickpeas are tender - roughly 1 1/2 hours, stirring occasionally.

While the chickpeas are cooking, heat 2 tablespoons of oil over medium heat in a frying pan. When hot, add the coriander seeds, coconut and chilies to the pan. Stir and fry until the coconut begins to brown. Transfer to a blender, along with 2/3 cup of water and blend into a paste. Set aside.

Heat the remaining 2 tablespoons of oil in the same frying pan over medium high heat. When hot, add the mustard seeds and fry until they turn grey and begin to splutter and pop. Add the curry leaves to the pan, stir and remove from the heat.

When the chickpeas are finished cooking, add the coconut paste, mustard and curry leaves and sea salt to the pot. Simmer for another 15 - 20 minutes, stirring occasionally. Remove the cinnamon sticks, bay leaves and cardamon pods before serving.

Serves 4.
More chickpea recipes from Lisa's Vegetarian Kitchen:
Chickpeas, Kidney Beans and Lentils with a Spicy Tomato Sauce
Chickpeas and Paneer in a Spicy Creamy Gravy
Chickpeas with Coconut Sauce
Spicy Chickpeas with a Tangy Tomato Glaze

On the top of the reading stack: Never Let Me Go by Kazuo Ishiguro

Audio Accompaniment: Under the Wood by SYSYPHE (this track pleasantly drowns out the doozers who are yet still making a terrible racket on our street.)

Sunday, October 24, 2010

Spaghetti squash "pumpkin" shake

Well, I've finally given up trying to beat this neck, trapezius injury thing on my own. I'm seeing the physical therapist tomorrow. I'm dying to get back to writing children's books which I do for enjoyment.


I did publish my first book today on Amazon about my pet friends who I write about on this site. "Best Friends" features my dog Kona (AKA Sandy in the book), Shadow (a feral cat from awhile back), Pumpkin and Oreo. If you have a Kindle, take a look at http://www.amazon.com/Best-Friends-Sandy-her-ebook/dp/B0048ELBSO/ref=sr_1_1?ie=UTF8&m=AG56TWVU5XWC2&s=books&qid=1287938114&sr=1-1
I'm continuing my love affair with spaghetti squash. I thought why not turn spaghetti squash into a pumpkin shake, smoothie. It actually tasted just like a pumpkin smoothie.

Spaghetti squash "pumpkin" shake

Ingredients:
  1. One 1/2 small spaghetti squash, baked until tender and chilled.
  2. 1/2 cup liquid, either Sleepytime Vanilla tea (strong brewed) or alternative milk beverage such as Tempt hemp milk (unsweetened) or a combo of both.
  3. Liquid stevia to taste (use the alcohol-free kind). I use SweetLeaf Clear.
  4. Pumpkin pie spice
  5. 1 tsp. guar -gum for thickening
  6. 2 cups crushed ice

Directions:

  1. Scoop out spaghetti squash.
  2. Place all ingredients in a blender or food processor.
  3. Blend at high speed until smooth and thick.
  4. Add a bit more liquid if needed. Consider adding some Tempt milk or other milk for added creaminess.
  5. Serve sprinkled with more pumpkin pie spice and a bit of SweetLeaf Stevia powder.

Saturday, October 23, 2010

Chicken, steak and spaghetti... oh my!

The small remodel is trudging along, with the wall finished being built and both sides painted to match the existing colors. The cabinet makers were by earlier in the week to finish up the measurements, which will hopefully speed that process so we can get this wrapped up before Thanksgiving! We're still waiting to see if we can match the granite as close as possible to the slab that was already in the house before we moved in, but I'm not convinced that's going to happen... not sure what we will end up doing in that case - anyone been through that? We've been fitting in meals when there isn't dust and debris floating around, but nothing to write home about - here are a few meals we made in recent times!

One of the dishes we made, Apricot-Basil Chicken Salad, was an interesting twist to your good 'ol chicken salad. Grilled, poached or roasted, prepare (or pick up!) your chicken in whichever fashion suits you - we went the roasted route, using a mix of bone-in thigh and breast meat, seasoned simply with salt and fresh ground black pepper. To make the salad a bit lighter, instead of your traditional mayonnaise dressing base, a greater portion of the mayo is swapped out for a plain, thick Greek-style yogurt.

What also makes the dressing a bit different is the acid used, rather than lemon juice, fancy champagne vinegar is mixed in for a zesty perk. Toasted almonds (sliced or slivered), a bit of minced raw onion, a stalks' worth of diced celery find their way into the creamy mix for texture, along with dried apricots, a few leaves from the celery (bonus use - don't toss them away!), fresh basil and of course, the cooked chicken, shredded. We scooped this onto a hearty slice of toasted whole wheat bread to call it dinner, but if you are feeling a little decadent, think about using a warm croissant.

Keeping with the intriguing dressing theme, back when we picked up an overflowing pale of blueberries from the farmers' market, we threw together this Spinach Salad with Steak and Blueberries. There are a couple of specialty ingredients in the dressing that may throw you off, but you don't have to seek them out if you don't wish to.

The first is raspberry vinegar, which bolsters the fruity notes from the fresh blueberries, but others you might already have should work - apple cider, red wine or sherry vinegars would be ones to think about. The next is walnut oil, which is rich and nutty in flavor, but is fairly expensive - if you'd rather skip that, canola oil works too. The steak is simply seasoned and grilled (with a fair amount pink left if you can!), then sliced into strips to be laid on top of a bed of baby spinach leaves that was tossed with the snazzy dressing (made with said blueberries!). To finish off each plate, the tops were scattered with crumbled salty feta, crunchy toasted walnuts and, of course, a smattering of blueberries to tie all the ingredients together. Different for sure, but definitely a dynamic combination!

Also on our list of newly tried recipes was this Spaghetti Frittata. Use leftover plain spaghetti if you have any, about 4 cups worth, or do as we did and just cook up a half pound of nutty whole-wheat noodles. Eggs, whisked with a little milk to loosen them up, will hold all those wiggly al dente noodles together with a bit of richness, but it will need help to ratchet up the flavor. Fresh grated Parmesan cheese was a good start, and soon to follow was chopped parsley, fresh basil and a mess of onions that we cooked to a sweet golden color before we began.

The recipe called for a spritz of nonstick spray to cook the frittta (using the same skillet the onions were cooked in - bonus points for less pans to wash!), but since this is a fairly light dish to begin with, we swirled around a pat of butter to coat the pan instead. Many frittatas will have you finish them off in the oven, however this eliminated that step and has you flip the whole shebang over and cook it on the stove. This may seem scary, but be confident and just follow the directions using a plate or platter to help you with the flip. To add a little extra moisture and brightness, top the cooked round with chunky pieces of chopped fresh tomato just before serving. If you're not a fan of frittatas, I do suggest you give this a try anyway as this doesn't come across nearly as eggy - more like a noodle pie!


Wednesday, October 20, 2010

Homemade Ricotta Cavatelli Made Easy!

A few weeks ago my girlfriend let me borrow her BeeBo Cavatelli Pasta Maker it was the first time I ever used a machine, all I can say is wow, what a great invention!

If you're crazy about cavatelli, those shell-like ridged noodles that capture and hold the flavor of a sauce so well, then have no fear you can have these made, cooked and on your table in no time at all. I was amazed at just how easy this process was, you simply feed a strip of pasta dough into the machine and turn the handle; the machine does the rest. The rollers send the dough past a drum set with two tiny blades which cut the dough into small pieces and presses them against the drum’s ridged lining. As quick as you can turn the handle is as fast as they come popping out, you'll have trays of them done before you know it!


If you want to freeze some, leave them individually on the tray as shown above placing the whole tray in the freezer, when completely frozen you can then bag them up, mine took about a half hour to 40 minutes to freeze.

The ricotta dough is my favorite they turn out so light tasting, you won't get that heavy doughy feeling at all I promise! They also cook up really fast, just place them into salted boiling water and when they rise to the top, which only takes a few seconds, they're pretty much done and you can start scooping them out.
Whatever sauce you choose you can be sure that those deep ridges will catch it all!

A simple sauce made of olive oil, garlic, red pepper flakes and some of the pasta water was the perfect combination for the fresh cavatelli with shrimp and broccoli.


Tossing them into a light marinara sauce is my personal favorite, even my 14 month old granddaughter loved them, I cut them into thirds for her and she gobbled them up!

Here's the food processor method for making the dough
Serves 4
4 cups of flour
1 egg
1 lb. ricotta cheese
1 t. salt
1/4 cup milk
Using the metal blade process the flour, egg, ricotta and salt together, pour the milk through the tube and process again until dough ball forms. That's it!
At this point if you get the machine you'll have instructions as to how thick the dough should be when you roll it out and cut it into strips.

If you want to make the cavatelli by hand without the machine (why would you?) you can still enjoy this recipe.
You might consider putting this on your Christmas list, I highly recommend it!
Buon Appetito!

Think Food and a Giveaway

I am excited to announced that one of my recipes was recently published in a new cookbook entitled Think Food, published by Posit Science. My Goat Cheese Toasts with Arugula, complete with Extra-virgin olive oil, is sure to nourish and please your tummy. This lovely book features recipes from 50 bloggers. Each recipe is accompanied by a professional photo, along with information about the cook who contributed their creation. I am especially delighted to offer my readers an opportunity to receive a copy of this book, at my expense. I will ship anywhere in the world. All you need to do is leave a comment, and I will do a random draw to determine the winner. Comment by November 6th for a chance to receive a copy of this most inspiring book. Do note that this book is not vegetarian, though there are some wonderful options for vegetarians and vegans included.

Crunchy Chicken Salad


We're all looking for new, fun and interesting ways to present chicken to our families. In honor of our upcoming recreational Sunday class, "Chicken Six Ways," which promised to teach all of us a few new ways to cook our favorite bird, we invite you to try Chef Avram's favorite chicken salad recipe, which adds crunch and life to all of all that boiled soup chicken that we never know what to do with. Chef Avram reports that this sharp, simple and savory recipe is a big crowd pleaser. It's perfect for an Erev Shabbos dinner or lunch, served with challah, toast or matzah.

To sign up for Chicken Six Ways, a class which will be given by Chef Russell Moss, Executive Chef of the 92nd Street Y Tribeca Cafe, on Sunday, November 7th, call 718-758-1339.

Ingredients:

3 and 1/2 cups cooked chicken (24 ounces)
3/4 cup minced celery
1 small onion, minced
3/4 cup minced water chestnuts
1 cup mayonnaise
1 tbsp minced fresh dill (or 1/2 tsp minced dried dill)
2 tbsp white vinegar
3 tbsp Canola oil
Salt and white pepper to taste

Procedure:

Remove all skin, bone and cartilage from the cooked chicken and dice the meat into 1/4 inch cubes. Place into a sanitized mixing bowl.

Finely mince the onion, water chestnuts, and celery. Squeeze all excess water from the minced vegetables (using a clean towel or cheesecloth) until they are quite dry. Add the vegetables and all other ingredients to the chicken.

Mix well to bind. Chill immediately. Garnish with additional minced fresh dill.

Tuesday, October 19, 2010

Coconut-Macadamia Shortbread Cookies...

For quite a long while, coconut was on the list of foods Jeff declared he didn't like and to be honest, I was not much of a fan of it growing up either. However, we made a Coconut Biscotti a few years ago on a whim and I found it was actually enjoyable and Jeff slowly came to the appreciate it the same. Fast forward to present day, coconut is no longer a dirty word and we have these Coconut-Macadamia Shortbread Cookies that we made for the Weekly Wednesday Treat Day to show for it.

A trio of coconut wiggled their way into these cookies - shredded coconut, thick cream of coconut (think Coco Lopez - you know, the stuff to make Piña Coladas?) and a splash of pure coconut extract for good measure. Before working with the macadamia nuts, you'll will want to toast them until their pale outsides turn a light golden color - you could do this in a skillet, but I find happens more evenly if you take care of it in the oven.

Shoot for 8 to 10 minutes (stirring a few times) at 350 degrees. Because you want them well distributed throughout each cookie, the nuts need to be ground first - however, with their high fat content, you do need to be a little careful as the macadamias could turn into nut butter quickly. To help prevent that, a couple tablespoons of sugar are added, along with a scoop of the dry ingredients to absorb excess oil from the nuts - be sure to use the pulse button for more control.

Just as the nuts were blitzed in the processor, the same was done with a portion of the shredded coconut - this way the shreds won't become unruly when you roll and cut the dough. Once the dough comes together, it is fairly soft and will roll out much easier if it is divided in half, with each being rolled in saran wrap and chilled to firm up.

The dough halves are rolled out to roughly 1/4" thick, but because the butter inside will have softened a bit, do yourself a favor and slide the dough sheets back into the fridge once more - not long, about a half hour will do. The re-chilled dough is then cut into squares using a fluted cutter and as long as you don't work the dough too much or use too much excess flour, feel free to reroll and cut the scraps as needed for maximum yield. If you don't have a square cutter and still want the shape, use a ruler and pastry wheel to knock it out - otherwise, a regular cookie or biscuit cutter would work fine.

Before the cookies are baked, the tops are brushed with a beaten egg white and rained on by a shower of coconut. Let the edges of the cookies and coconut tops be your guide for doneness - they'll be ready when both are golden brown. Rather than whisking them off to wire racks to cool, let them rest on the sheets they baked on until they are cool to the touch. This way, the buttery cookies will be crisp out the outside, but still tender and a bit crumbly.

With an in-your-face coconut attitude, you could tell what these cookies would hold as soon as you picked one up with their powerful aroma jet-setting right up to your nose. I wondered if all that coconut would be the only thing you could taste, but since the macadamias are rich enough and you've toasted them, its flavor doesn't fade away. Saying that, the nut's unique quality didn't come through as much as I had hoped - it plays more of a buttery, supportive role (and an expensive one at that!) than anything. We've done a fair amount of chocolate treats lately, so we decided to forgo any here - but, if you wanted to dress them up even more, a hasty drizzle of melted bittersweet chocolate would be an appropriate, tasty finish.

Sunday, October 17, 2010

Spaghetti squash with fresh marinara

Here I am sitting at the computer again trying to stretch out my stiff neck muscles. I can't believe how long it takes to recover from a neck injury. But it is getting better but with teeny tiny baby steps.

I am continuing to look for ways to enjoy my crop of spaghetti squash, basil, stevia, tomatoes and bell peppers from my garden. We are still experiencing an extended growing season, thanks to warmer than normal October weather.

I made fresh marinara sauce with my garden veggies. This sauce is so good it can be eaten raw, if desired. I have eaten it both ways. I serve it over spaghetti squash scooped out and fluffed up like noodles. It also can be ladled over zucchini ribbons which offers another chance to use up big zucchinis. You use a sharp vegetable peeler, pare the squash on all sides, to create thin ribbons that similate noodles. I will try this version next.

Spaghetti Squash with Fresh Marinara

Ingredients:
  1. 2 pounds roma tomatoes or other type, washed and halved or quartered, depending on size
  2. 1 cup fresh basil leaves
  3. 1/2 cup dry-packed sun-dried tomatoes, softed in warm water
  4. 1/2 cup olive oil
  5. Handful of fresh stevia leaves or 1 tsp. of liquid stevia
  6. sea salt
  7. black pepper
  8. 2 bell peppers, seeded and roughly chopped
  9. Optional: 1-2 cans of tomato sauce

Directions:

  1. Place all ingredients in a food processor and process until the mixture resembles a fine salsa.
  2. Serve as is or place in a pan with tomato sauce to warm.
  3. Scoop out spaghetti squash from baked squash. Season with salt and pepper and ladle sauce on top.

Saturday, October 16, 2010

More catching up...

It has been quiet around here, I know - sorry about that! The craziness begins again (did it ever stop?)... this week, contractors started working on parts of the kitchen we've been wanting to change and it has been a fairly messy process - here's a snap of the work seen from the great room. We'll post a few finished pictures when the work is complete!

In the mean time, I'm still working on that list of recipes that I haven't gotten a chance to sit down and write about. The first is a recipe we caught on PBS from Rick Bayless - Enchiladas Especiales Tacuba Style. With a fairly unique (to us, at least) homemade enchilada sauce, I went out and picked up the missing ingredients we didn't have from the market the day after we caught the episode it aired on. The sauce is made in béchamel fashion with butter, flour, milk and to keep it lighter, chicken broth, then had it's flavor dial turned up by adding fresh poblano chiles, charred over a gas flame (the broiler works well too), garlic and chopped spinach.

For the shredded chicken, I had the extra time to gently poach what I needed, but you could just as well pick up a rotisserie bird from the market to make life easier. Use a good melting cheese on top - some to look for would be Chihuahua, asadero, Monterey jack or even a mild cheddar if that's all you have. We made these in individual baking dishes, but pack them in a 9" x 13" dish for a family-style presentation. With a sprinkling of chopped cilantro, we both thought this was a top-notch meal, without too much work (although, the stack of dishes in the sink said otherwise!).

The next recipe I have for you is some Balsamic Baked Potatoes we had as a side recently. Halved new potatoes (if they are very large, quarter them), chicken broth, dark balsamic vinegar, ample amounts of garlic (8 whole cloves, smashed!) and sprigs of fresh thyme were placed in a square pan, seasoned with salt and pepper, then baked long enough until the potatoes were plenty tender and the once liquid-y concoction reduced to a glaze.

We thought these potatoes were good, especially how hands off this was to make with all of the work being taken care of in the oven. If I had any tips on this, I'd suggest you line the pan with foil as the glaze bubbles and splatters often, making for an awful clean-up process of the baking dish.

For the last recipe we have to share today, Open-Faced Sandwiches with Ricotta, Arugula and Fried Egg, we actually had as a late breakfast on a lazy Saturday morning. With a slab of crusty and toasted whole-wheat bread for a base, the top was slathered with creamy ricotta that was smashed with sharp Parmigiano-Reggiano cheese, fresh thyme leaves and just enough salt to highlight the subtle notes in the ricotta. On top of that layer was a light salad of peppery arugula, tossed with extra-virgin olive oil, bright lemon juice and of course, the obligatory pair of salt and fresh ground black pepper.

For the final layer, and Jeff would say, most important, a fried egg that cooked just long enough to set the whites, leaving the yolks soft, fluid and decadent, was then slid directly on top like a flashy beacon. This would definitely work well for dinner, but it made for a fantastic breakfast that kept our stomachs happy and content for quite some time - I think we'll be making this snazzy dish often!

Recipes

Friday, October 15, 2010

A CKCA Favorite: Mulligatawny Soup


Mulligatawny soup is a favorite at CKCA, made every semester in Chef Avram Wiseman's pro class, often in the first week of cooking. It's a great recipe for students to get comfortable in the kitchen, working as part of a brigade, because there's lots of mis en place (ingredients to be made ready for cooking) to prepare that can be shared among a group of people. It's also a great example of the use of delicious Indian spices that can be used in many recipes to add flavor and color to everyday recipes such as roasted vegetables or chicken.

There's no reason this recipe can't be made at home, and it's a thick, spicy, comforting soup that's just perfect for the fall. It can be either served as an appetizer or as a full meal in itself.


Ingredients:

1/4 cup vegetable oil
3 cups chopped onions (about 1 pound)
5 garlic cloves, chopped
4 cups eggplant, peeled,cut into small dice
1 1/2 tablespoons garam masala (see a recipe for this spice blend in "comments")
1 1/2 teaspoons ground coriander
1 teaspoon turmeric
1/2 teaspoon cayenne pepper
2 bay leaves
2 cups dried red lentils
8 cups low-salt chicken broth
2 cups diced cooked chicken
1 cup canned unsweetened coconut milk
3 tablespoons fresh lemon juice
2 cups cooked basmati rice
Lemon wedges for garnish

Procedure

Heat vegetable oil in heavy large pot over medium-high heat. Add onions and cook until golden brown, stirring frequently, about 15 minutes. Add garlic and sauté 2 minutes. Add garam masala and next 4 ingredients; stir 1 minute. Add eggplant and continue cooking. Add lentils; stir until coated. Add chicken broth. Bring the soup to a boil; reduce heat to medium and simmer until lentils are very tender, about 30 minutes. Discard bay leaves.

Puree the soup using a hand wand or food processor until smooth. Stir in chicken, coconut milk, and lemon juice. Reheat and season to taste with salt and pepper.

Divide rice among bowls. Pour soup over. Garnish with lemon wedges; serve with cilantro sprigs, chives and a dash of coconut milk.

Butternut Squash Tart with Caramelized Onions and Kale

Butternut squash has become a favorite in our house, it's so versatile and can be used in so many different dishes. I usually buy one every week, cut it into chunks, roast it and tuck it away in my fridge to use up during the week.

It's so readily available this time of year and with prices like this how can I refuse!

I'm always looking for new ways to use it so while researching the Internet I kept seeing Smitten Kitchen's galette version, those caramelized onions she used were calling my name so I decided to make a tart but changing it up a bit using puff pastry instead and adding kale for color and added flavor. I've already made this twice we loved it that much!
There's something about the sweetness of the caramelized onions paired with the sweet and buttery squash, it's such a perfect match, add to that fontina and parmesan cheese and a touch of sauteed kale, this dish screams fall!
I promise you you won't be disapointed, you can even substitute spinach if you want or omit it all together. The puff pastry was a dream to work with, so easy to put together once all the components were ready.
Butternut Squash Tart

Prepare Squash, you can do this ahead of time
Peel squash cut into chunks toss in a bit of olive oil salt and pepper then and roast in a 375F- 400F oven til tender and golden.

One sheet of puff pastry, defrosted
Unfold the pastry sheet onto a Silpat or parchment paper and place on a baking sheet. Using a sharp knife, score a 1/2-inch border around the edge of the pastry sheet. Prick the center of the pastry sheet thoroughly with a fork.

Caramelized Onions
For this I sliced three onions into half moons and then sauteed them in a dab of butter and olive oil, added a pinch of sugar and a couple of sprigs of fresh thyme slowly cooking them for almost 40 minutes until a rich golden brown color appears. Don't hurry this process even though you might want to, it really makes a difference!
For the kale I just took a about 6 leaves and cut them chiffonade style, saute in olive oil until wilted.
When all those components are finished sprinkle parmesan on the base of the puff pastry sheet, then add your caramelized onions all around then touches of kale here and there, maybe a cup or so of cubed fontina spread about, more parmesan and a drizzle of olive oil on top and along the border of the puff pastry, place in a 400F oven for 25- 30 minutes or until nicely browned on the bottom.
Each year during the fall local Girl Scouts create nature themed scarecrows near my home, very creative don't you think?
Have a wonderful weekend and Buon Appetito!