Sunday, August 15, 2010

It's My Blogiversary Today!

Three years ago today Proud Italian Cook was born, I can honestly say it has been one of the best things I've ever done, mainly because along this journey into the blogosphere I have met the most incredible people with so much amazing talent that inspires me on a daily basis.
Thank you, Thank you, Thank you to all of my dear blog friends, subscribers, readers , family and friends, I appreciate and adore all your comments!

Looking forward to my journey into next year!
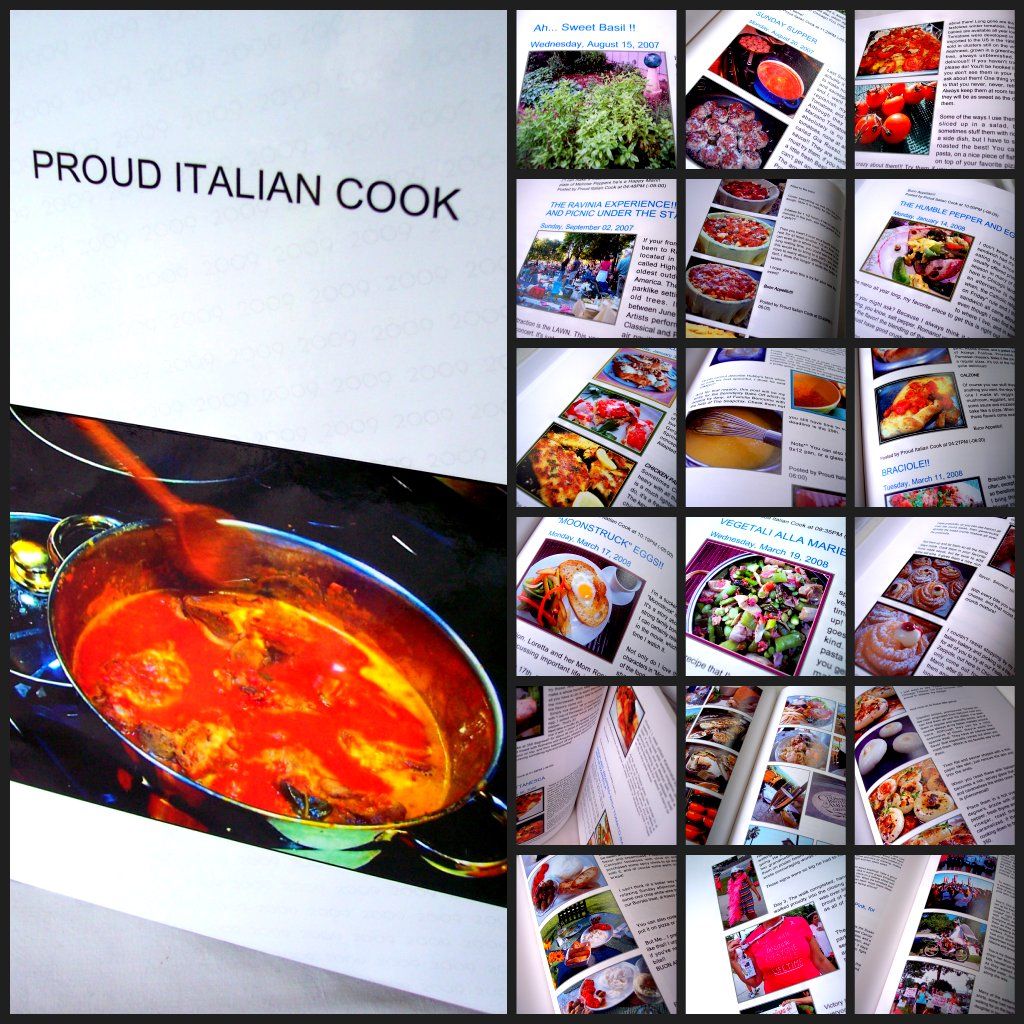

To celebrate my blogiversary I'd like to introduce you first to a company called Blog2Print, they provide bloggers with an easy way to turn their blog into a professionally printed book.

A friend of mine first told me about them and she encouraged me to check them out. I started thinking how cool it would be to have my blog in book form, something to hand down to my family, after all our blogs are like a journal into our daily lives whether it be through food, travels or any other passion that we blog about.
Then one day I got an email from Julie at Blog2Print and she asked me if I would like to try out their product, as you can imagine I was very excited.


With Blog2Print you can print all your pictures, posts, and comments if you wish, if you've been blogging for a while you might want to do it in volumes like I did. Depending on how many photos and text you have that's going to determine the pages used in your book. For instance my first volume consisted of 123 pages, plus a dedication page, and 4 table of contents pages. I was able to fit most of my first year of blogging into the book. I didn't add any comments into my book it would have taken up too many pages and added to the cost, but that's entirely up to you.

It's easy to do and you can personalize your book any way you want with their simple instructions.


I think giveaways are more fun when everyone has the chance to participate so for one lucky reader you'll be recieving a coupon code for forty dollars from Blog2Print so all my Canadian and International friends can take part, just be aware that there will be some shipping costs. Shipping within the U.S. is free.


So now you can use that coupon to create your own blog book like mine up above. I wish I can offer one to each and every one of you but unfortunately I can't, but at least I hope I've encouraged you to think about doing this your self. You can test it out for free and see your blog in book form on their site with no obligation at all, go and check it out but once you do you'll be hooked like me. The quality is even better in person!


All you have to do is leave a comment on this post, the winner will be announced on Friday August 20th.
I will be using random generator, if I can figure it out! lol

Wednesday, August 11, 2010

Using Up Our Summer Bounty

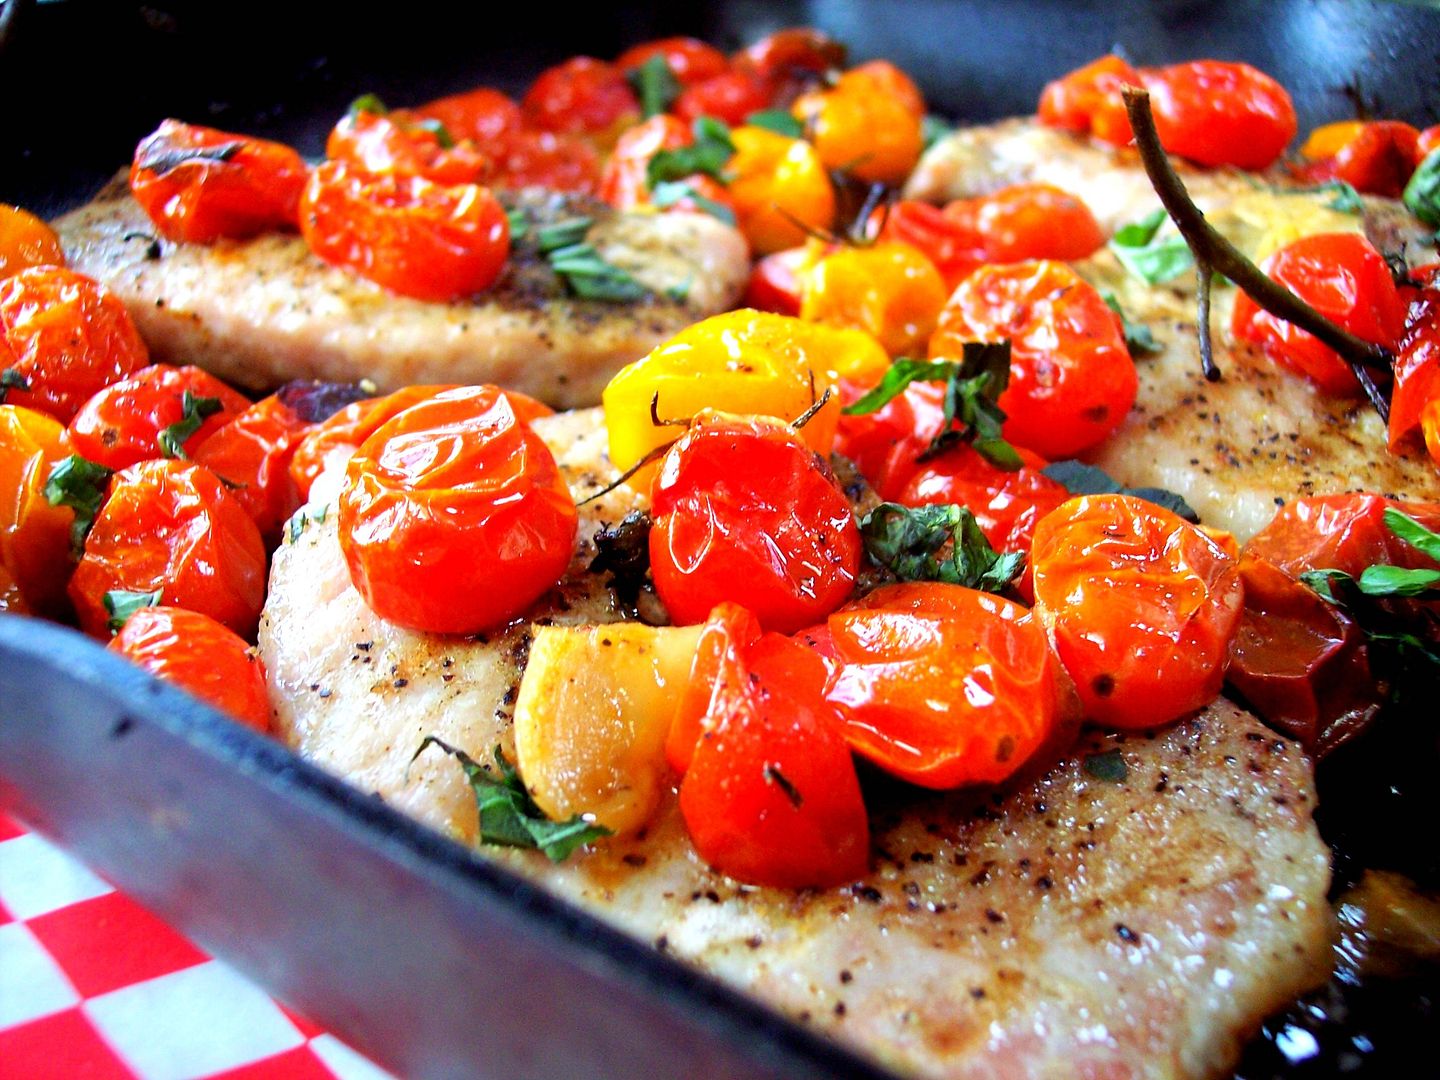
This quick and easy meal is something I made often this summer, everything is cooked in one pan and before you know it it's on your table, providing you use thin cut boneless pork chops like I used here or some chicken breast.


It's been so hot and muggy here the humidity is off the charts, walking out to my grill is not appealing, sometimes I'd rather cook inside with my nice cool air conditioning on. Yes, you have to heat up your oven for this but it's nothing compared to the heat outside plus it's a great way for me to use up my sweet cherry tomatoes that we're fortunate enough to be picking on a daily basis.

We have an over abundance this year I think we went a little overboard in our planting of cherry tomatoes I'm constantly thinking of ways to use them, I made this recipe up out of necessity and it's become one of our summertime favorites.

I love the different colors and how they cluster together and stay on the vine. They're so delicious fresh, but sometimes I think I love them even more when they're cooked and caramelized, the flavor just intensifies! We have a few different varieties some being heirlooms. Right now I'm looking out my window and all I see is red!


I used my cast iron grill pan, but you can use any heavy pan, you're first going to brown your pork or chicken on top of the stove and then finish it off in a 375F oven until the meat is cooked through and the tomatoes are caramelized.
Pre heat oven
Season your meat with salt and pepper
Brown on both sides in a hot pan drizzled with olive oil
Toss in your cherry tomatoes, I used a lot as you can see
Shaved garlic
Fresh basil
Drizzle olive oil over top of the tomatoes
When finished garnish with more basil, you can never have too much!
Serve this with some five minute cous cous on the side and you're done! I told you it was easy.
Buon Appetito
I hope you can stop by and help me celebrate my 3rd Blogiversary on Sunday, until then have a great week!

Monday, August 9, 2010

Middle Eastern Mezze: Moroccan Cigars


Moroccan Cigars are a delicious appetizer and a great addition to any Middle Eastern Mezze (sampler or small plates). In honor of our upcoming course, Middle Eastern Mezze, which will occur on Monday, August 23, at 7:30pm (a few spots are still available! Call 718-758-1339 to sign up!), we are sharing the following delectable recipe for Moroccan Cigars.

About this class: "The lightness and emphasis on fresh ingredients makes the cuisine of the Mediterranean and middle east the perfect summer fare. Join CKCA and one of our top chef instructors for an exploration of "mezze" or small plates and tasty nibbles from a variety of countries throughout this region."

Moroccan Cigars

1 onion, finely chopped
2 tbsp olive oil
1 pound ground Lamb, Beef, Veal or Chicken
2 teaspoons ground cinnamon
1/2 teaspoon ground allspice
1/4 teaspoon ground ginger
1 pinch cayenne pepper (optional)
freshly ground pepper
kosher salt
1/2 cup finely chopped fresh parsley
5 eggs, beaten
1 lb filo pastry (or large wonton wrappers)
6oz margarine, melted

Saute the onions in the olive oil until softened. Add the ground meat and cook until there is no more pink. While cooking, separate the meat with a spatula to avoid clumps from forming. Add spices, and salt and pepper to taste. When mixture is seasoned to your liking, add the beaten eggs and remove from the flame. Mix until the eggs become creamy. It will be slightly wet. Add the chopped parsley to the mixture, reserving a bit for a garnish.

Cut filo pastry lengthwise into a stack of rectangles. Brush the corners of three sides of the first rectangle with melted margarine. Place a small amount (approximately 2 tsp) of the filling along one of the shorter edges (the one without margarine), and roll into a tight cigar, folding in the corners as you go. Brush the end of the cigar with more melted margarine if necessary to secure it and to keep it from opening.

Place unbaked cigars on a non-stick pan or over non-stick foil. Brush tops with melted margarine. Bake at 350 degrees for 25-35 minutes until golden brown. Cigars can also be finished by frying in olive oil until golden brown on all sides. Garnish with chopped parsley.

Yields 20-30 cigars, depending on how much filling you use for each cigar.

Sunday, August 8, 2010

Avocado Carobsicles

I just made my first frozen treats with my new popsicle molds. They're not beautiful but they are tasty and full of nutrition. The ingredients include avocado, which is low glycemic and loaded with antioxidants, and silken tofu, a good protein source.

I omitted the sweeteners I saw in similar recipes and replaced them with stevia. They still taste good to me but if you are not used to eating a no-sugar diet you could try some agave nectar. I used carob powder but cacao or cocoa powder could be used instead.

Avocado "Carobsicles"

1 pkg. silken tofu, drained
1 medium avocado, pitted
1/2 cup unsweetened hemp milk
1 tsp. guar gum
6 T. raw carob powder
1 T. alcohol-free vanilla
liquid stevia to taste
pinch sea salt

Put all the ingredients in a food processor and blend until smooth and creamy. Add additional hemp milk if needed.

Pour mixture into individual popsicle molds. This can be tricky especially if your mixture is too thick. Freeze the "carobsicles" until solid, about 4-6 hours, depending on your freezer. Run under hot water to release your popsicle.


Friday, August 6, 2010

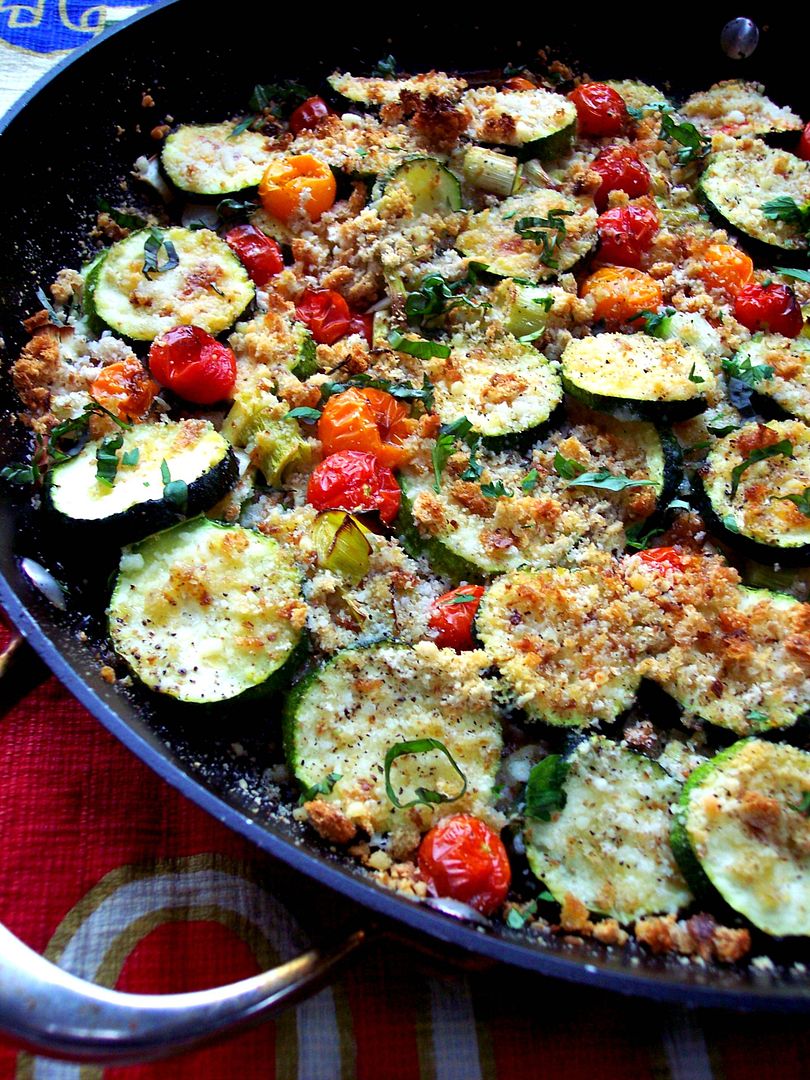
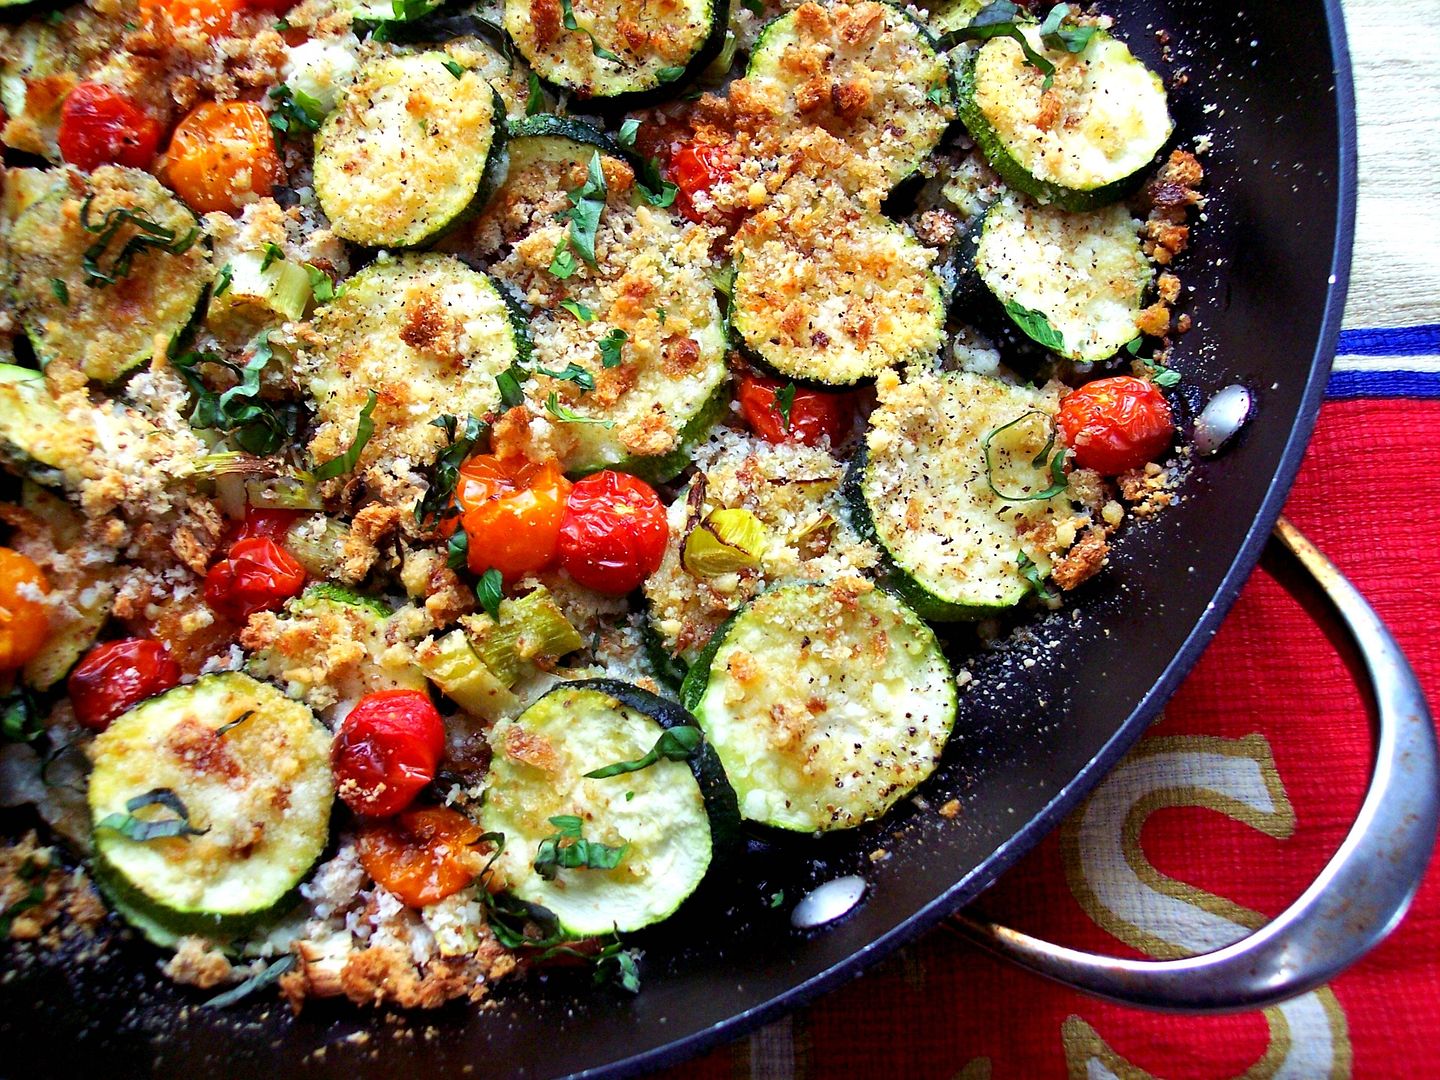
Zucchini Tomato Gratin

Our garden is producing wonderful things and I'm inspired daily to use everything we pick. Winter comes all too soon here and it's going to be really sad to say goodbye to all this freshness! So for now I give you my version of a gratin.

I like to make this in a wide pan, I use this paella pan that I have, I'm sure you've seen it in many of my posts, but I love it I can't help it! I'm sure a cast iron pan would work as well.
First layer; Sweet Vadalia onion ring slices on a nice drizzle of olive oil ( the pan I use gets them all caramelized on the bottom)
Sliced zucchini
Handfull of romano cheese spread all over
Toasted homemade Italian bread crumbs spread about
Small cherry tomatoes placed all around
I had some cut leeks I needed to use so I threw them in, glad I did!
Drizzle with olive oil
More cheese
More breadcrumbs
Repeat!
Garnish with fresh snipped basil
Place in a hot oven at 425 till tender and crispy and the tomatoes pop and get caramelized, you could even place it under the broiler at the end to crisp up the top more, I have a convection roast feature on my stove so that always does the trick.
The imported romano cheese, the tomatoes ( you must use cherry tomatoes, please) the homemade breadcrumbs and those caramelized onions paired with the zucchini, I'm telling you I could almost become a vegetarian!
But instead I made more of that beautiful cod along side it. I saw this preparation on the cable TV show, Every Day Food, it's so simple but BURSTING with flavor! Chop up some fresh herbs, I used basil, chives and parsley, now grate some fresh lemon zest into the mix. Salt and pepper your fish and swipe the top with Dijon mustard, now press it down into the herb mixture and of course drizzle with olive oil. Bake at 425 till translucent. This...Was...Fabulous! The fresh herbs complemented the fish so well, so light, so summer!

Now for a little palette cleanser, how about some Key Lime Pie. Sorta. You see my husband and I are crazy about key lime pie, but living here in Chicagoland key limes are not readily available so I never even thought about making this, until I saw Pioneer Woman's post on it.
She calls it Key Lime Pie, Sorta because she uses regular limes not key limes, no problem here because I just bought 20 limes for $1.00! So I was inspired. I won't even tell you how many times I've made it this summer, we crave it! I know it's not the so called "real thing" but it's darn close!
So before summer is over all you key lime pie lovers, you MUST make this! So here's the recipe.
Note: From my guilt of making this so often I used reduced fat condensed milk and I even bought a reduced fat graham cracker crust and the result was just as good. I would encourage you to try her version first, but if you go past 3 pies like I did, you might want to think about switching things up! It's so refreshing on a hot summer day.
Enjoy your weekend and Buon Appetito!
Oh, next week August 15Th is my 3 year Blogiversary I hope you can stop by for a visit, I have a nice giveaway too!

Wednesday, August 4, 2010

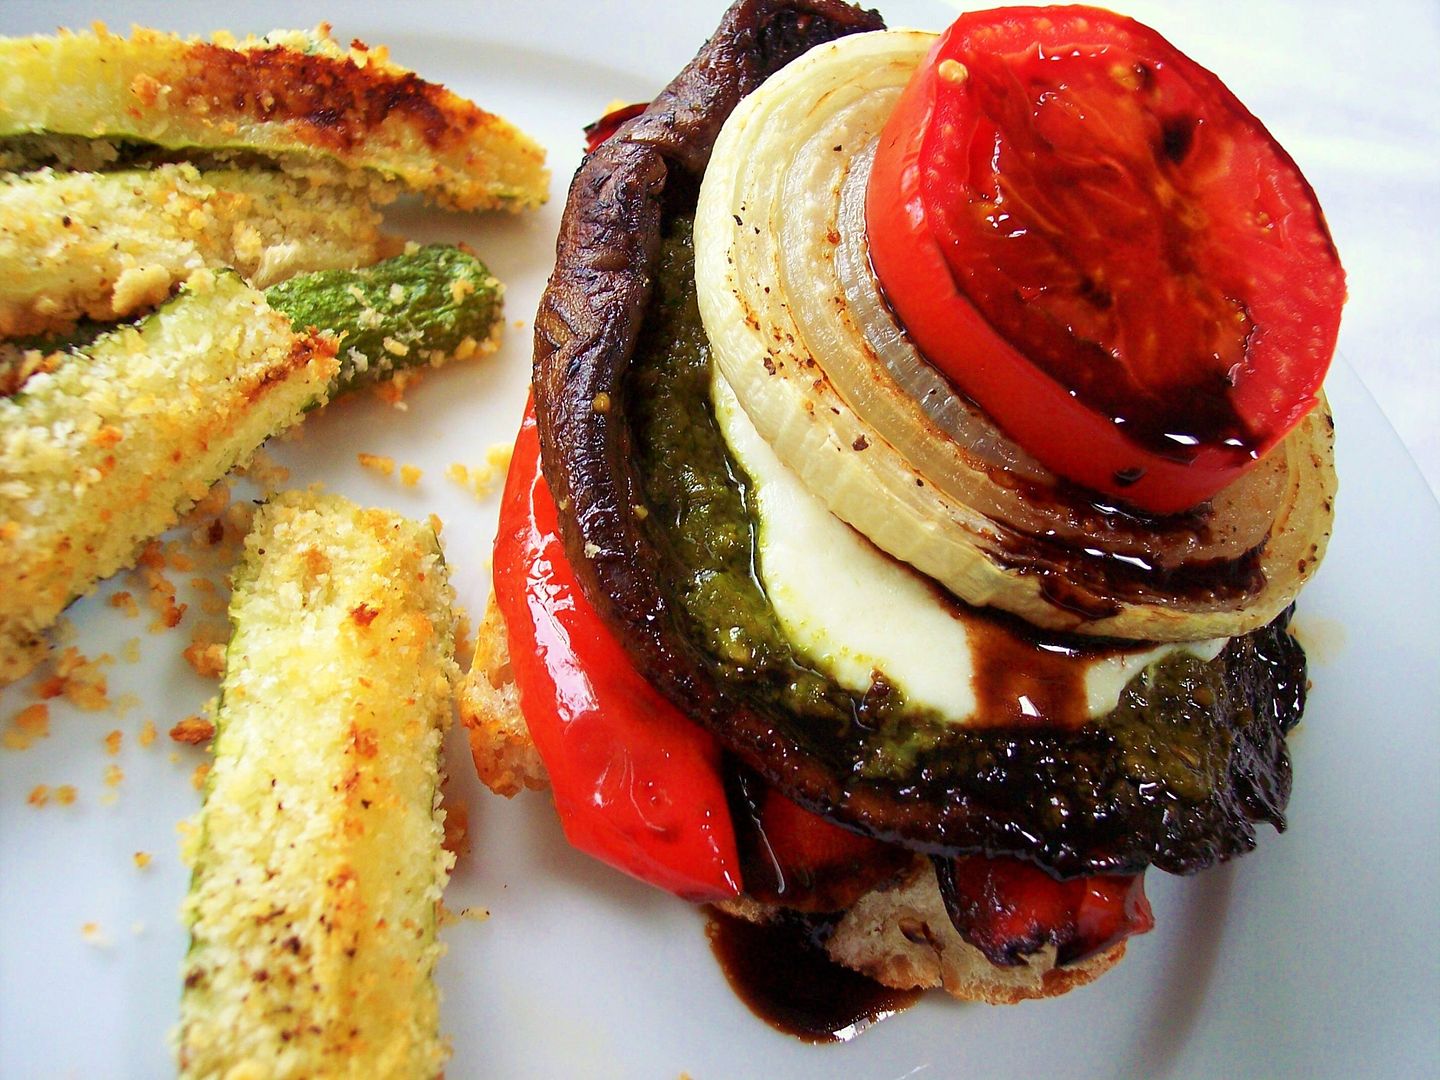
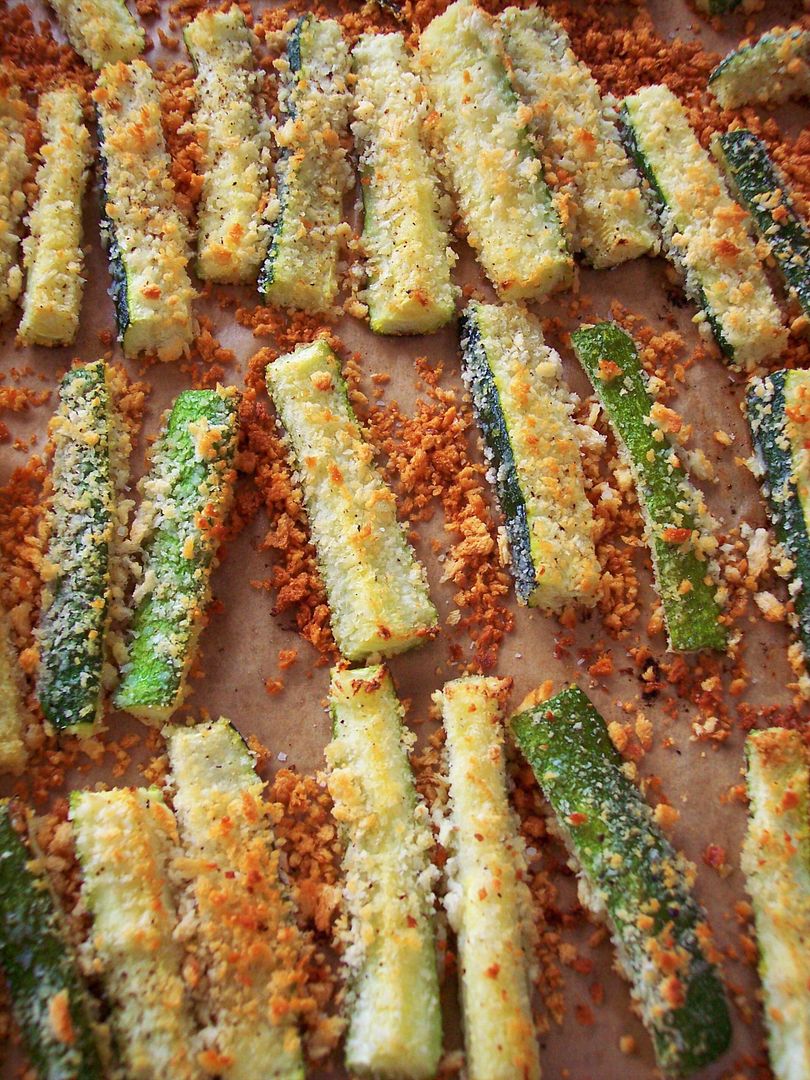
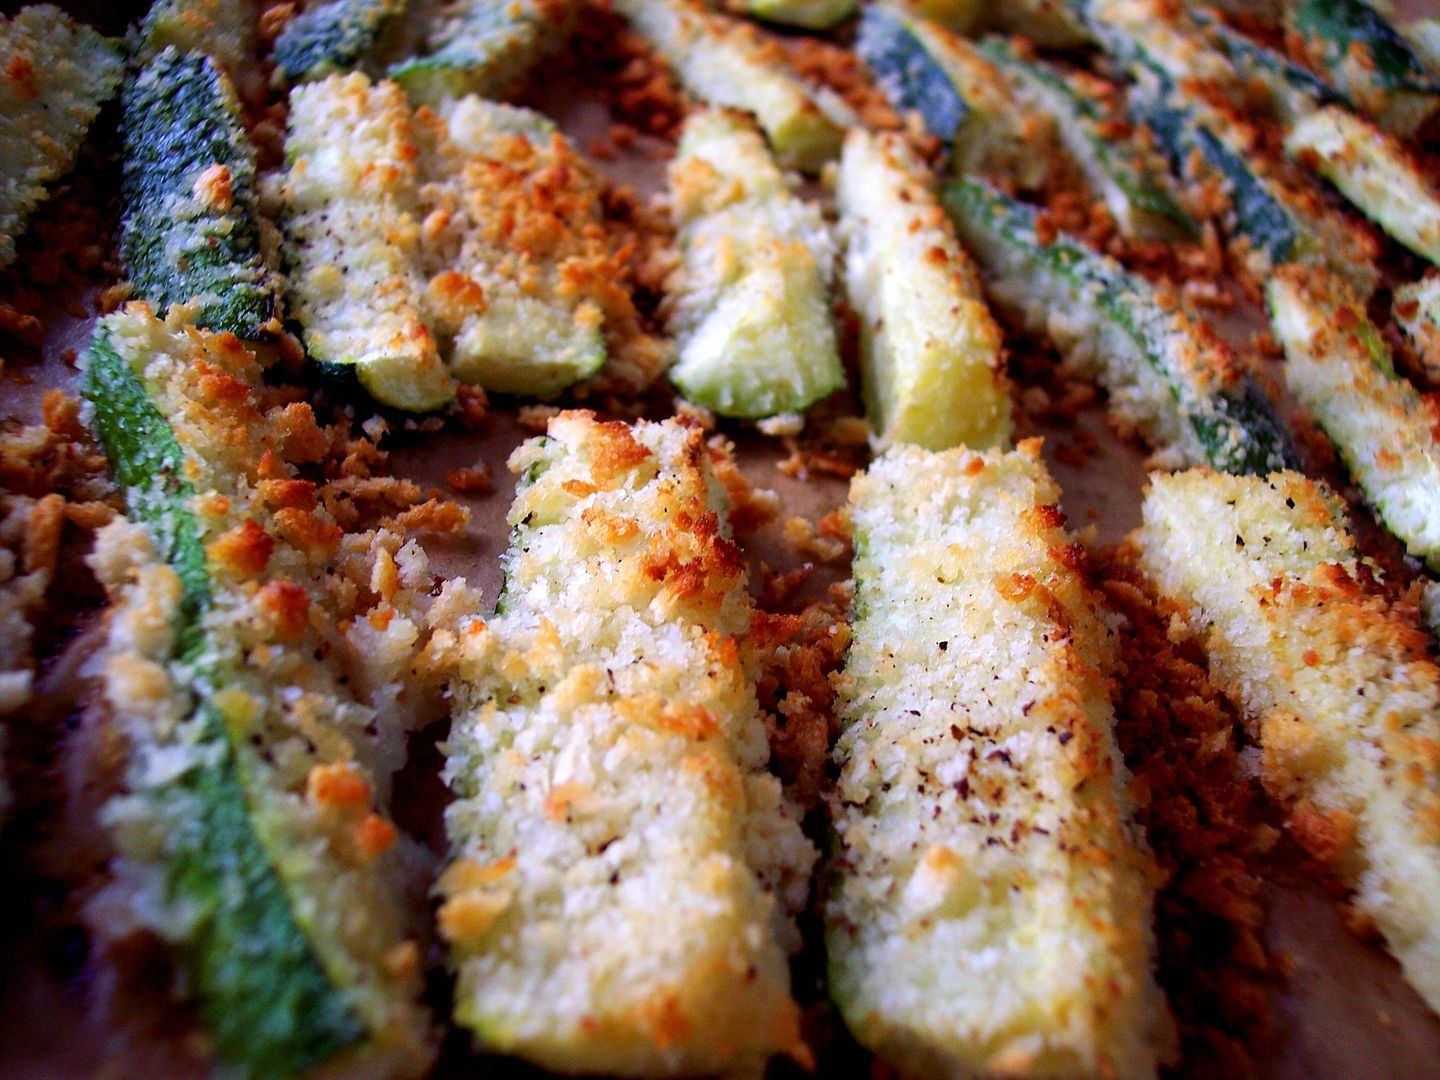
Open Faced Portobello Burger with Zucchini "Fries"

This burger is so good I promise when you bite into this you won't miss the meat at all! Portobello mushrooms have such a meaty like texture, the large caps are a perfect replacement for a beef burger. I try to make a few vegetarian meals each week and this has been one of our current favorites.


I like to grill up a bunch of different vegetables over the weekend and then use them in various quick meals during the week. I almost always do onions, red and green peppers, zucchini, and eggplant, however with the portobello's I like to cook them up right before I assemble this, which I did inside on my grill pan.


For this burger roasting or grilling the vegetables will give you the same results.
I like to remove the gills on the mushrooms but you don't have to, then just a quick toss in olive oil, salt and pepper is all you have to do to prepare them.


Each component together gives you an amazing end result!

Toasted ciabatta bun
Grilled red pepper
The portobello, gill side up
A dollup of basil pesto
Fresh mozzarella
Grilled onion
Tomato
Garnish with a balsamic glaze over top

You could eat this with a bun top but it was so huge, I would suggest using a thinner bun.

The zucchini fries were made by tossing them in olive oil to coat then dipping them individually in a mixture of panko breadcrumbs and grated parmesan or romano cheese, salt and pepper.

Bake them in a hot oven around 450F turning them as they brown. If you have a convection roast feature use that to brown them up faster.

Have a great week and Buon Appetito!

Monday, August 2, 2010

Gluten-free energy bars

Finding an ACD-friendly energy bar is like trying to find a needle in a haystack. Of course, the packaged ones are loaded with sugar and carbs. What would you expect? That's the stuff that provides energy when you exercise.

I do a lot of cycling, including some long-distance rides but those pre-packaged energy bars won't work for me because of my candida issues. It took some searching on the internet and experimenting but I finally came up with my own ACD-friendly energy bar. It's got lots of good stuff in it and gives me some "go power." I tweaked a recipe from Thrive Fitness.

Carob Strawberry Chia Energy Bars

Ingredients:
  1. 1/4 cup carob powder
  2. 1/4 cup vanilla rice protein powder
  3. 1/4 cup white chia seeds
  4. 1 cup fresh or frozen strawberries
  5. 1/4 cup ground flaxseed
  6. 1/4 cup raw sunflower seeds
  7. 1 tsp. lemon juice
  8. Sea salt to taste
  9. 1/2 cup sprouted quinoa
  10. Liquid or powdered stevia to taste

Directions:

  1. One day ahead of time, prepare the quinoa seeds. Soak in water for six hours. Drain and place in a seed sprouter. Once the seeds have formed tails from sprouting, place them in a food dehydrator and dry to the touch.
  2. Mix all the ingredients in a food processor.
  3. Spread the mixture (1/4 inch thick) on a sheet in your dehydrator. Dry for about one hour. Then flip and continue drying. Total drying time: about two hours.
  4. Cut into pieces of desired size. Freeze until ready to use.